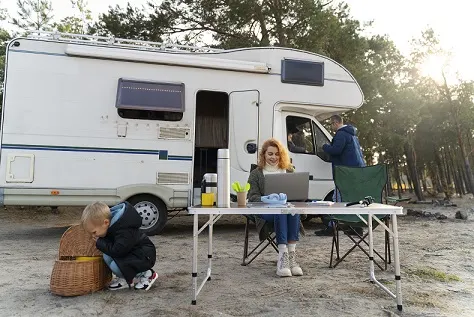
If you’re planning your next road trip or camping adventure, keeping your travel trailer water tank clean is one of the most important parts of staying healthy and comfortable on the road. The process of travel trailer water tank cleaning might sound complicated, but the truth is — it’s simple, safe, and something you can do yourself with just a few basic tools.
Here’s the short answer you came for:
To clean your travel trailer water tank, drain all old water, rinse with clean water, sanitize using a non-toxic cleaner or diluted vinegar solution, flush thoroughly, and refill with fresh water.
That’s it — no expensive service, no harsh chemicals. This routine keeps your freshwater tank, gray tank, and black tank bacteria-free, ensuring every sip and shower stays clean during your journey.
Why Travel Trailer Water Tank Cleaning Matters
Your travel trailer’s freshwater tank is the heart of your mobile home’s water system. It stores the water you drink, cook, and wash with. Over time, dust, algae, and mineral deposits start to build up, especially when the tank isn’t emptied after trips. The result? Cloudy, smelly, or even unsafe water.
For full-time RVers or families who travel seasonally, regular RV water tank cleaning is more than hygiene — it’s health protection. Unclean tanks can harbor bacteria like E. coli, cause foul odors, and shorten the life of your water pump and plumbing lines.
A 2024 hygiene advisory from the UK Government’s Drinking Water Inspectorate noted that stagnant or uncleaned water tanks can promote bacterial contamination if not sanitized regularly (source: GOV.UK). That means your tank isn’t just a storage space — it’s a responsibility.
Step-by-Step: How to Clean a Travel Trailer Water Tank
Here’s the full cleaning process that works for any RV, camper, or caravan. Whether you use your trailer every weekend or a few times a year, follow this 5-step system to keep your tank spotless.
Step 1: Drain the Old Water
Turn off your water pump and open all the faucets. Empty the freshwater tank, gray tank, and black tank completely. Let gravity do the work — drain into a proper waste disposal area or dump station.
Tip: Always empty your tanks in a legal dump site — not on the ground or near campsites.
Step 2: Inspect and Rinse
Once drained, inspect your freshwater system. Look for debris, slimy residue, or discoloration inside the tank or around hoses. Using a hose or portable pressure washer (set on low), rinse the inside walls and bottom of the tank.
Avoid high-pressure settings — especially for plastic water tanks — to prevent cracks or damage.
Step 3: Prepare a Natural Cleaning Solution
Skip harsh bleach or chemical disinfectants — they leave behind toxic residues and strong odors.
Instead, make a non-toxic cleaner using:
- 1 cup of white vinegar or baking soda
- 4 liters (1 gallon) of clean, warm water
Pour this mixture into the freshwater tank and let it sit for about 4 to 6 hours. Drive your trailer a short distance during this time — the motion helps the solution clean every corner inside the tank.
Step 4: Flush and Refill
After soaking, drain the solution completely. Then, flush the system with clean water at least two to three times. Run water through all taps (hot and cold) to clean your water lines too.
This removes any remaining vinegar or baking soda smell and ensures the tank is fully sanitized.
Finally, refill your tank with clean, drinkable water. You can use bottled or filtered water to maintain taste and quality.
Step 5: Clean the Gray and Black Tanks
While your freshwater tank is drying, it’s the perfect time to clean your gray and black water tanks too.
Add a mix of baking soda and warm water into each tank, let it sit for an hour, and then rinse thoroughly.
This helps remove odor, prevent sludge buildup, and keep your waste sensors working properly.
Quick Maintenance Checklist
(Your one and only bullet list for easy recall)
- Drain all tanks after every trip
- Sanitize with vinegar or baking soda every 2–3 months
- Keep tank lids sealed tightly
- Flush lines and faucets after cleaning
- Avoid storing water for more than 2 weeks
- Inspect hoses and fittings for leaks regularly
Real-Life Case Study: Perth, Australia
Let’s take an example from Perth, where a couple named David and Laura travel across Western Australia in their 24-foot caravan.
After six months of full-time travel, they noticed an unpleasant odor in their RV freshwater system. Instead of using bleach, they followed a natural cleaning routine — draining, rinsing, and soaking the tank with vinegar for six hours before refilling it.
Within days, their water tasted fresh again, and the odor disappeared completely. They also reported that their RV pump worked better, and they didn’t need any chemical tank tablets.
Now, they repeat this process every three months — saving money and improving their overall water quality.
This story shows how eco-friendly cleaning methods can protect your health, water quality, and the environment at the same time — no matter where you live or travel.
Natural Alternatives to Chemical Cleaners
If you’re traveling with kids or pets, using chemical-free cleaning methods keeps your water safe. Here are a few effective, natural options:
- White Vinegar: A natural acid that removes bacteria, scale, and odor.
- Baking Soda: Perfect for deodorizing and scrubbing without scratching.
- Lemon Juice: Adds freshness and helps break down mineral buildup.
These ingredients are safe for all plastic and stainless-steel tanks and can be disposed of without harming nature — perfect for sustainable travelers.
Signs Your RV Water Tank Needs Cleaning
Even with regular maintenance, you should clean your system immediately if you notice any of these signs:
- Foul smell or metallic taste in the water
- Murky or discolored water
- Reduced water pressure from taps
- Green or slimy patches in the tank
- Visible sediment in your sink or shower
If you see one or more of these, don’t wait — bacteria spreads fast inside stagnant water.
Common Mistakes to Avoid During Cleaning
Even experienced RV owners make these cleaning errors that can harm their tanks:
- Using strong bleach: It damages plastic surfaces and seals.
- Forgetting to flush properly: Residue can make your next refill unsafe.
- Leaving the tank damp: Trapped moisture encourages algae growth.
- Ignoring hoses and pumps: They carry bacteria too — always flush them.
- Storing with water inside: Always drain before long-term parking.
Following a simple cleaning cycle every season keeps your RV plumbing system in perfect condition.
Related Internal Resource
For more on household water hygiene, check out our full guide:
How to Clean Your Water Tank at Home
This article explains home-level water tank cleaning methods that complement your RV maintenance routine.
Expert Tips for Long-Term Travelers
- Always refill from trusted, potable water sources only.
- Use an inline water filter before your tank inlet.
- Add a carbon filter under your sink for drinking water.
- Clean your RV water heater (hot water tank) every 6 months — see our full guide: Hot Water Tank Cleaner.
- Drain everything before winter storage to prevent freezing and damage.
Health Benefits of a Clean Water System
Proper travel trailer water tank cleaning ensures:
- No bacteria like E. coli or Legionella in your water
- Safe water for cooking, brushing, and bathing
- Longer lifespan of your RV plumbing
- Better taste and odor
- Lower maintenance costs
Clean water is not a luxury — it’s part of safe travel hygiene.
Maintenance Schedule (Global Recommendation)
- Every trip: Drain tanks after use.
- Every 3 months: Deep clean with vinegar or baking soda.
- Every 6 months: Flush and sanitize water lines.
- Annually: Professional inspection for leaks and corrosion.
Following this routine keeps your caravan’s freshwater tank reliable and bacteria-free all year long.
Conclusion
Whether you’re a weekend camper or a full-time traveler, travel trailer water tank cleaning is your first defense against health risks and plumbing issues.
By using simple tools, non-toxic cleaners, and consistent maintenance, you’ll always have clean, fresh water — no matter where the road takes you.
Clean water means a healthier journey, a longer-lasting RV, and peace of mind for every mile.
Frequently Asked Questions (FAQs)
1. How often should I clean my travel trailer water tank?
You should clean your tank every 3 months or after long storage periods. If the water smells bad or looks cloudy, clean it immediately.
2. Can I use bleach for RV water tank cleaning?
It’s possible, but not recommended. Bleach can damage seals and leave chemical residue. Natural options like vinegar or baking soda are safer and equally effective.
3. What’s the best natural cleaner for RV tanks?
White vinegar is best for disinfecting and removing bacteria, while baking soda helps remove odors and scale buildup.
4. How do I prevent algae or bad smells?
Keep the tank dry after cleaning, store your RV in shade, and avoid leaving water stagnant for more than two weeks.
5. Is this method safe for all types of tanks?
Yes — it’s safe for plastic, fiberglass, and stainless-steel tanks used in RVs, motorhomes, and caravans.
Summary
Regular travel trailer water tank cleaning keeps your freshwater system safe, odor-free, and bacteria-free.
Use vinegar or baking soda instead of bleach, flush your system every few months, and dry your tanks before storage.
With these simple steps, your next adventure will always begin with clean, healthy water — wherever in the world you go.
Ethan Wells is the author of Water Tank Guides, a blog focused on practical tips for water tank cleaning, maintenance, and installation. His mission is to help readers keep their water clean, safe, and their tanks long-lasting through simple, easy-to-follow guides.

