If you’re wondering how to install a water heater expansion tank, here’s the quick answer:
You need to mount the tank on the cold-water supply line, just above your water heater, using a T-fitting and thread seal tape. Then, pressurize the expansion tank to match your home’s water pressure (typically 50–60 PSI). That’s it — you’ve completed the most crucial step in protecting your hot-water system from pressure damage.
However, proper Water Heater Expansion Tank Installation involves more than just connecting a pipe. To ensure long-term safety and performance, you must choose the right tank size, balance the pressure correctly, and follow local plumbing codes. When done correctly, it not only prevents leaks and bursts but also improves your heater’s efficiency and lifespan.
Let’s explore why this small tank is essential, how to install it the right way, and what common mistakes homeowners should avoid.
What Is a water heater expansion tank installation?
A water heater expansion tank installation is a small, pressurized vessel connected to your home’s plumbing system. It absorbs the extra pressure that builds up when your water heater warms cold water.
When water heats, it expands — and in a closed water system, that extra volume has nowhere to go. Without an expansion tank, that added pressure can strain your pipes, fittings, or even the water heater tank itself. Over time, this can lead to leaks, reduced heater life, or even burst pipes.
An expansion tank works as a safety cushion. Inside it is a rubber bladder that separates water from compressed air. When the water expands, it pushes against the bladder, which absorbs the pressure instead of letting it stress your plumbing system.
Why You Need a Water Heater Expansion Tank
Even if your home’s plumbing seems fine, expansion pressure is quietly working against your system.
Here’s why installing one is a must:
- It prevents damage to your water heater caused by thermal expansion.
- It stabilizes pressure, protecting valves, pipes, and joints.
- It extends the heater’s lifespan, saving repair and replacement costs.
- It improves safety, reducing risks of burst pipes or leaks.
- It maintains water heater efficiency — pressure-stable systems heat faster and more evenly.
Most modern building codes (especially in the U.S. and Canada) now require expansion tanks in closed water systems, particularly where a check valve or pressure regulator is installed.
Tools and Materials You’ll Need
You don’t need a professional plumber to do this job, but you must use the right tools. Here’s the basic setup:
- Adjustable wrench
- Pipe cutter or hacksaw (if modifying existing pipes)
- Thread seal tape (Teflon)
- T-fitting (¾ inch typical)
- Mounting strap or support bracket
- Pressure gauge
- Air pump or tire inflator
- Expansion tank (size depends on your water heater capacity)
Choosing the Right Expansion Tank Size
The size of your water heater expansion tank installation depends on two main factors:
- Your water heater’s capacity (in gallons)
- Your home’s water pressure (in PSI)
As a general rule:
- For a 40–50-gallon water heater, a 2-gallon expansion tank is ideal.
- For larger systems (75–100 gallons), go for a 4.5-gallon tank.
You can use a Water Tank Volume Calculator like the one on WaterTankGuides.com to check your tank’s capacity and match it with the correct expansion tank size.
Step-by-Step Guide: How to Install a Water Heater Expansion Tank
Now let’s walk through the full process carefully.
Step 1: Turn Off the System
- Shut off both the cold-water supply and power or gas line to your heater.
- Allow the tank to cool before working on it to avoid burns.
Step 2: Locate the Installation Point
Locate the cold-water supply line that leads into your water heater. This is where you’ll install the expansion tank — ideally above the heater or within 3 feet of the inlet.
Step 3: Prepare the Connection
Use a T-fitting to create a branch connection in the line. Wrap Teflon tape around all threaded joints to prevent leaks.
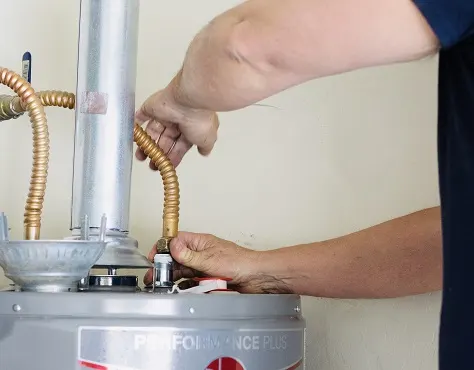
Step 4: Mount the Expansion Tank
Screw the expansion tank into the fitting. Support it with a metal strap or bracket to relieve stress on the pipes — remember, when filled, it can weigh several pounds.
Step 5: Match the Pressure
Before turning the water back on, use a pressure gauge to check the water pressure in your home. Then, using a hand air pump, adjust the air side of the expansion tank to the same pressure setting (usually 50–60 PSI).
Step 6: Restore and Test
Turn the water and power/gas back on. Run hot water to confirm consistent pressure and check for leaks at all joints.
✅ You’ve successfully installed a water heater expansion tank!
Common Mistakes to Avoid
Even a small error can lead to long-term plumbing problems. Here are the top issues to watch out for:
- Installing the tank on the hot line instead of cold — it won’t work properly.
- Not matching the air pressure with the system pressure.
- Forgetting to use Teflon tape or joint compound.
- Skipping support brackets — pipes can bend over time.
- Ignoring leak checks after installation.
A properly installed expansion tank will last 5–10 years, depending on water quality and usage.
Maintenance and Inspection Tips
Once installed, maintenance is minimal but important.
Check your expansion tank pressure every six months using a tire gauge on the air valve.
If you notice any of these signs, it’s time for servicing or replacement:
- Water dripping from the relief valve
- Fluctuating water pressure
- No air pressure when tested
- Rust or corrosion on the fittings
You can use your home water pressure regulator to maintain system balance and protect both the expansion tank and water heater tank from excessive strain.
Real-Life Case Study: Austin, Texas (USA)
A homeowner in Austin installed a new 50-gallon electric water heater but noticed random drips from the pressure relief valve. Their plumber discovered that the city’s plumbing code required a thermal expansion tank because of a check valve installed by the water utility.
After adding a 2-gallon expansion tank and matching it to the home’s 60 PSI pressure, the leaks stopped immediately. Within weeks, their water heater performance improved — steady temperature, no pressure fluctuations, and lower energy costs.
This real-world example shows how small preventive installations can protect your entire system.
Safety and Code Compliance
According to the U.S. Department of Energy (Energy.gov), maintaining proper water pressure and temperature in water heating systems helps reduce energy loss and extend appliance life.
Expansion tanks play a vital role in meeting plumbing safety codes and protecting against thermal expansion damage in closed systems.
Learn more at energy.gov.
Related Internal Links
For those who also maintain larger home storage systems, check our related guide on:
expansion tank installation requirement
Conclusion
Installing a water heater expansion tank installation is one of the simplest, most cost-effective ways to protect your plumbing system. It prevents pressure buildup, extends heater life, and keeps your hot water system safe and efficient.
This small tank takes less than an hour to install but can save you thousands in future repairs. Whether you do it yourself or hire a professional, ensure it’s properly pressurized and regularly checked for optimal long-term performance.
FAQs About Water Heater Expansion Tanks
1. Do all water heaters need an expansion tank?
Not always. If your plumbing system is open (i.e., without a check valve or pressure regulator), the pressure escapes naturally. However, in closed systems, an expansion tank is necessary to absorb thermal expansion safely.
2. How long do expansion tanks last?
On average, 5–10 years. Check the air pressure twice a year to extend its life. Replace the tank if you notice rust or leaking.
3. What pressure should the tank be set to?
Match it with your home’s water pressure — typically 50–60 PSI. Use a gauge to confirm before installation.
4. Can I install a water heater expansion tank myself?
Yes, it’s a moderate DIY plumbing task if you’re familiar with basic tools. However, if you’re unsure about your plumbing layout or water pressure, it’s best to call a certified plumber.
5. What happens if I skip installing one?
Skipping it may cause pressure buildup, leading to leaking valves, tank damage, or early water heater failure.
Summary
A water heater expansion tank installation prevents damage from pressure buildup in your plumbing. It’s easy to install — connect it to the cold-water line, adjust the pressure levels, and test for leaks. Regular inspection and proper sizing ensure safety, efficiency, and peace of mind in every home.
Ethan Wells is the author of Water Tank Guides, a blog focused on practical tips for water tank cleaning, maintenance, and installation. His mission is to help readers keep their water clean, safe, and their tanks long-lasting through simple, easy-to-follow guides.