If you’ve ever noticed your dishes covered with white spots, your shower walls lined with chalky residue, or your laundry feeling stiff even after washing — you’re likely dealing with hard water problems. That’s where your Water Softener Maintenance quietly steps in. But just like any home appliance, it needs regular care to keep doing its job right.
In this guide, you’ll learn how to maintain a water softener at home, clean it safely, and avoid costly issues like salt bridges and system clogs. Whether you’re a first-time homeowner or just want to extend the life of your system, this simple step-by-step maintenance plan will help you keep your soft water flow strong and steady.
How a Water Softener Works (and Why Maintenance Matters)
A water softener removes hard minerals like calcium and magnesium from your water using a process called ion exchange. Inside your system, tiny resin beads attract these minerals and swap them for sodium or potassium ions, leaving your water soft and gentle on pipes, skin, and clothes.
Over time, however, the resin tank and brine tank collect debris, salt buildup, and even bacterial film if not cleaned regularly. This causes your softener efficiency to drop — meaning harder water, higher energy bills, and shorter appliance life.
According to the U.S. Environmental Protection Agency (EPA), regular maintenance of household water treatment systems can improve efficiency by up to 30% and extend lifespan by several years (EPA.gov/WaterSense).
Why Regular Water Softener Maintenance Is Important
Skipping routine care might not cause immediate failure, but it will slowly affect water quality and your plumbing system. Here’s why consistent cleaning and inspection matter:
- Prevents salt bridges and resin clogs that block water flow.
- Keeps the ion exchange process running efficiently.
- Reduces scale buildup inside pipes and heaters.
- Extends the life of resin beads and control valves.
- Ensures clean, safe, and mineral-free water for the whole household.
Think of it like maintaining a car — a few small steps done regularly save you from big, expensive breakdowns later.
How Often Should You Maintain a Water Softener?
For most homes, perform a complete water softener maintenance check every 3 to 4 months. If your home uses well water or has high sediment levels, inspect it monthly.
Key maintenance tasks (like salt refill and brine tank cleaning) should be part of your seasonal home care routine — especially before summer and winter, when water demand changes.
Step-by-Step Water Softener Maintenance Guide
Now let’s go through each maintenance step in detail so your softener stays clean, efficient, and long-lasting.
1. Check the Salt Level
The brine tank — where salt mixes with water — is the heart of your system. It needs the right amount of salt to recharge the resin beads during regeneration.
Open the lid and inspect the salt level. It should be about half-full. If the level is low, refill it with high-purity salt pellets rather than rock salt, which leaves residue. Avoid overfilling, as it can cause salt bridges — solid crusts that prevent salt from dissolving.
2. Break Salt Bridges (If Any)
A salt bridge is a hardened layer that forms over time, trapping air pockets below. When that happens, your softener thinks it has enough salt, but in reality, the water below can’t reach it.
Use a broom handle or stick to gently tap and break up the crust. Avoid using sharp metal tools that could damage the tank.
3. Clean the Brine Tank
If you notice slimy residue or brown water in your brine tank, it’s time for deep cleaning.
Here’s a simple cleaning method anyone can follow:
- Turn off the water supply and unplug the unit.
- Drain the brine tank completely.
- Remove leftover salt and sludge.
- Scrub the interior with a mild mixture of vinegar and warm water (avoid harsh cleaners).
- Rinse thoroughly before refilling with clean salt and water.
Tip: This step also helps with cleaning water softener brine tank buildup naturally — no chemicals needed.
4. Clean the Resin Bed
Over time, iron and sediment accumulate in the resin bed, clogging its efficiency. Use a resin bed cleaner (or a natural citric acid solution) once every few months to flush out impurities.
Run a regeneration cycle afterwards to reset the system.
If your system uses well water with high iron, consider cleaning more often.
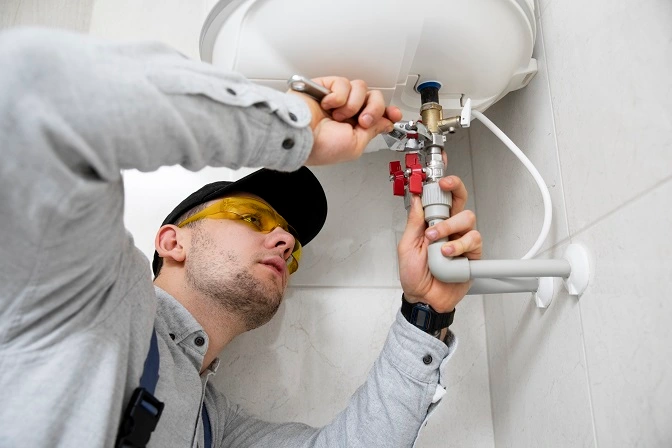
5. Inspect Valves, Tubes, and Control Head
Your softener’s control valve and tubing handle constant water pressure. Dust, scale, or brine residue can block them.
Remove visible debris, check for leaks, and ensure the regeneration timer functions correctly.
A slow or inconsistent water flow is often an early sign of blockage — fix it before it damages the resin beads.
6. Sanitize the System Once a Year
To prevent bacterial growth, sanitize your water softener once or twice annually.
Use a mild chlorine-free disinfectant or a hydrogen peroxide solution to rinse the brine tank and resin chamber. This keeps your system hygienic and free from unwanted biofilm.
7. Regeneration Cycle Check
The regeneration cycle is what “resets” your water softener. Ensure your system regenerates automatically — or trigger a manual cycle every few weeks if needed.
This flushes out minerals and refreshes the resin beads for the next round of ion exchange.
Common Water Softener Problems (and Easy Fixes)
Even with regular maintenance, small issues can pop up. Knowing how to fix them quickly keeps your system working flawlessly.
- Dirty Water Softener:
If your water looks cloudy or brown, your brine tank likely contains sediment or dirt. Clean it immediately. - Low Water Pressure:
A salt clog or scale buildup might be blocking water flow. Flush the softener with warm water and inspect the inlet valve. - Water Tastes Salty:
Excess salt in the tank or a malfunctioning drain line may be the cause. Check the drain valve and run a full rinse cycle. - No Soft Water Even After Regeneration:
This often means your resin beads are worn out. Replace them every 5–7 years for consistent results.
Real-Life Case Study: Omaha, Nebraska
In 2024, a family in Omaha noticed their water softener wasn’t performing well — soap wouldn’t lather, and hard water stains began reappearing.
The issue? A neglected brine tank clogged with a thick salt bridge and iron residue.
Instead of calling for costly service, they followed a DIY water softener maintenance routine:
- Drained and scrubbed the brine tank with vinegar.
- Refilled with solar salt pellets.
- Cleaned the resin bed using a citric acid solution.
- Reset the regeneration timer.
After one full cycle, water clarity improved dramatically, and their household appliances started running more efficiently.
The result? A cleaner tank, softer water, and zero professional cost — just 90 minutes of simple maintenance.
Eco-Friendly Maintenance Tips
Keeping your system green doesn’t mean less effective. Here’s a short guide to eco-friendly water softener maintenance:
- Use plant-based cleaners like vinegar or lemon instead of harsh chemicals.
- Dispose of old salt properly — never dump it into soil or drains.
- Install a high-efficiency water softener that regenerates based on water usage, not a timer.
- Reuse rinse water for cleaning patios or driveways (if safe to do so).
These habits reduce environmental waste and save water.
Mistakes to Avoid During Maintenance
Even small errors can cause big issues. Avoid the following:
- Overfilling the salt tank — it traps air and creates salt bridges.
- Skipping resin bed cleaning — reduces efficiency.
- Using detergent or bleach inside tanks — damages resin.
- Forgetting to rinse after cleaning — may cause salty water.
- Leaving the system unplugged — disrupts automatic regeneration.
Quick Maintenance Checklist
Perform this checklist once every 3–4 months for best performance:
- Check the salt level and refill halfway.
- Break any salt bridges.
- Clean brine tank and resin bed.
- Inspect hoses and valves.
- Run a regeneration cycle.
- Sanitize the system yearly.
Just one routine like this keeps your softener healthy and your household water system efficient.
Conclusion
A well-maintained water softener keeps your water pure, your pipes protected, and your appliances running efficiently. By following this simple DIY maintenance guide, you can save money, prevent breakdowns, and ensure consistently soft water without depending on professional servicing.
Regular checks, natural cleaning methods, and smart habits make a huge difference — not just for your home, but for your long-term water quality and comfort.
Related Articles:
How to Clean Your Water Tank at Home
How to Clean a Plastic Water Tank in Your House Without Chemicals
Frequently Asked Questions (FAQs)
1. How often should I clean my water softener?
Every 3–4 months for standard systems. If you use well water or have high sediment, clean monthly.
2. What’s the best way to clean the brine tank?
Drain, scrub with vinegar and water, and rinse thoroughly. Avoid using bleach or detergents.
3. How do I fix a salt bridge?
Gently poke and break the crust using a broomstick. Never use metal tools.
4. What causes brown or dirty water softener tanks?
Iron buildup or bacterial film. Clean with natural acids like vinegar or citric solution to remove residue.
5. Can I use rock salt in my water softener?
Avoid it. Rock salt contains impurities that clog the system. Always use high-purity pellets or solar salt.
6. How can I extend my water softener’s lifespan?
Follow a consistent maintenance schedule, clean the brine tank quarterly, and replace resin beads every few years.
Summary
Regular water softener maintenance ensures efficient ion exchange, cleaner water, and longer system life.
By cleaning the brine tank, checking salt levels, and avoiding salt bridges, homeowners can enjoy pure, soft water year-round.
A simple DIY routine every few months keeps your system working like new — safely and affordably.
Ethan Wells is the author of Water Tank Guides, a blog focused on practical tips for water tank cleaning, maintenance, and installation. His mission is to help readers keep their water clean, safe, and their tanks long-lasting through simple, easy-to-follow guides.